HOW TO: Manage Your Business’s Plan
By: Paul Brinkmann
- Compatible Plans: All
- Compatible Categories: All
So, you’re looking to upgrade or change your business’s plan! Awesome! We’re excited to work with you.
NOTE: This article assumes you already have your business created and associated with your account in our system. If you still need to do this, please check out “HOW TO: Create and Manage Your Business“
STEP 1: Navigate to your Business Dashboard

STEP 2: Navigate to the Business Plan page
On your Business Dashboard, select the business whose plan you wish to manage
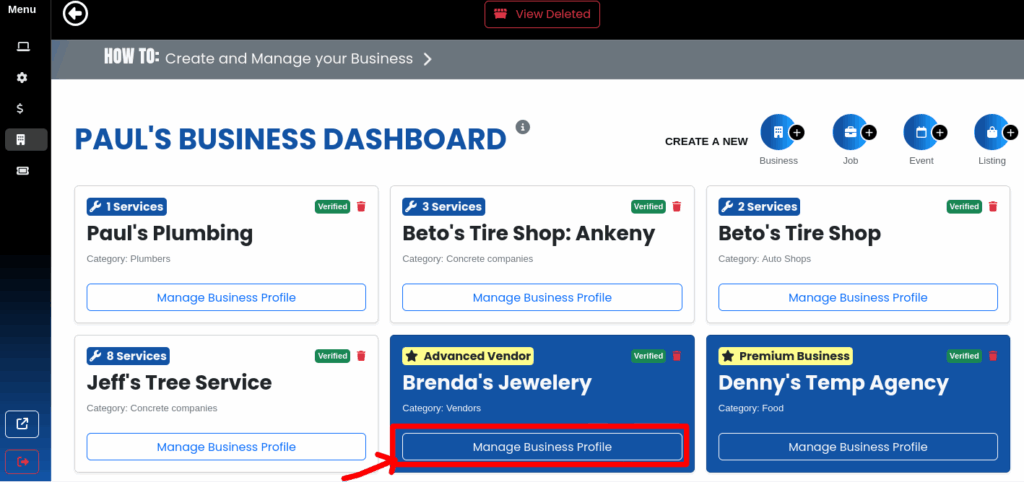
In this menu, you will find your plan tab! This will look a bit different depending on what plan you have
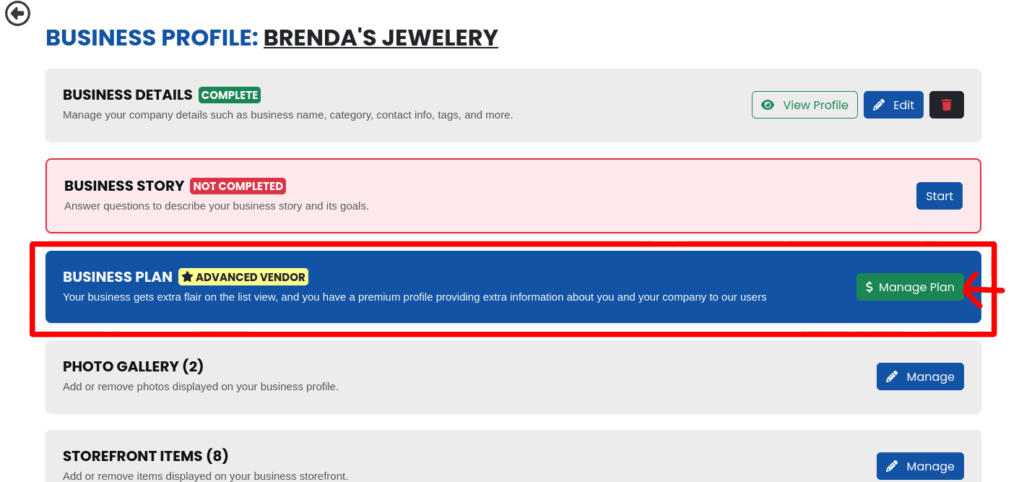
NOTE: This tab will only appear if your business is compatible with one of our automated plans. If your business is not, you can check here to see what SceneIT can do for you!
STEP 3: Select or Adjust your plan
Once you click $ Manage Plan, you will be navigated to a page that allows you to select or adjust the plan associated with that business! Here’s what that looks like, depending on your compatible plan type:
STEP 3a: Profiles
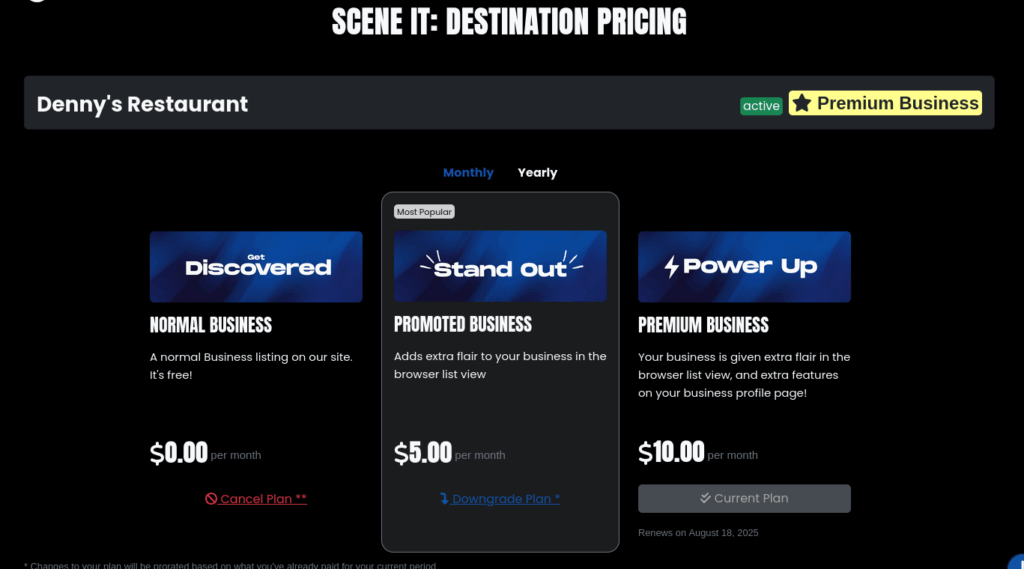
On Profile Pricing, you can select a different plan, or even a different frequency! Changes to your plan will be prorated and saved as credits on your account to be used for future purchases.
STEP 3b: Vendors
On Vendor Pricing, we only support yearly but you can cancel your plan!
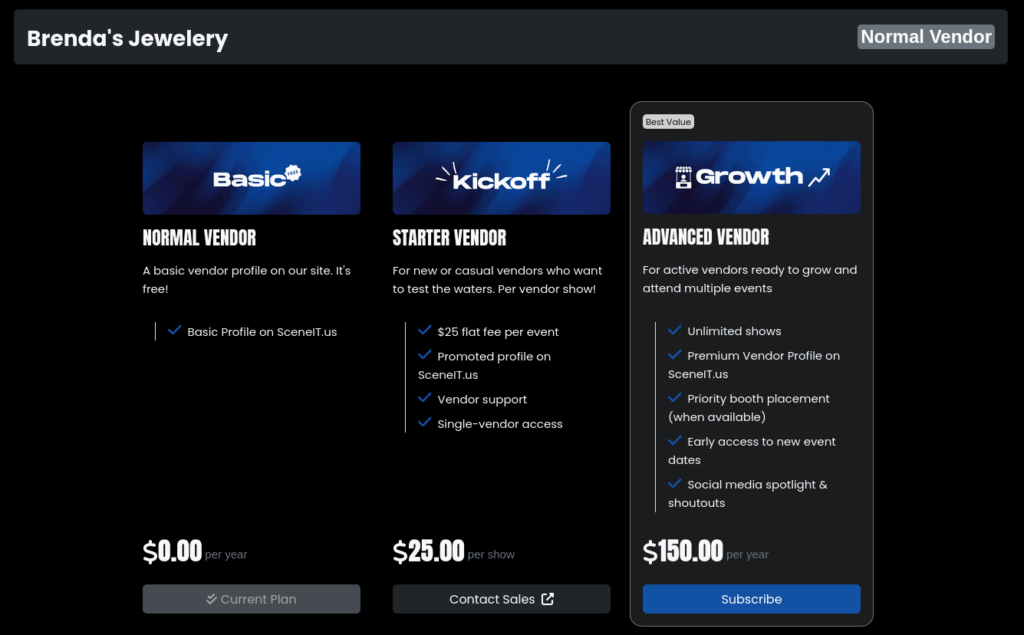
NOTE: As of writing, Standard Vendor is not an automated plan, and neither is the Vendor Show benefit of the Advanced Vendor plan. These systems are in progress, but for now you will have to talk to sales!
STEP 3c: Services
On Services Pricing, we only have one plan. However, you can adjust which services your business is listed under, or even cancel your plan!
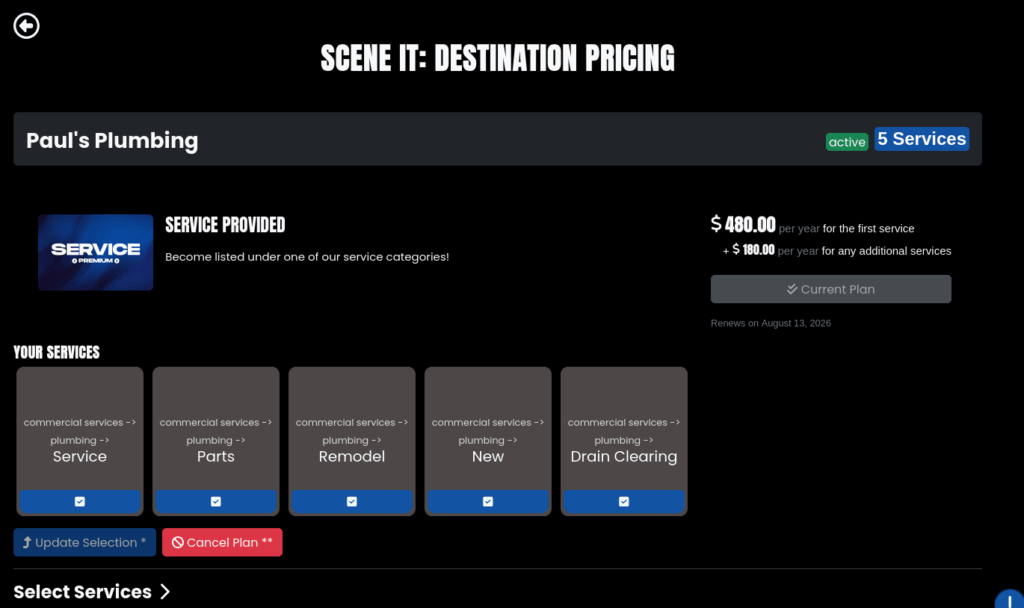
To select more services, click on the “Select Services >” drop-down and you will be opened to the menu where you can select more services!

The drop down looks like this:
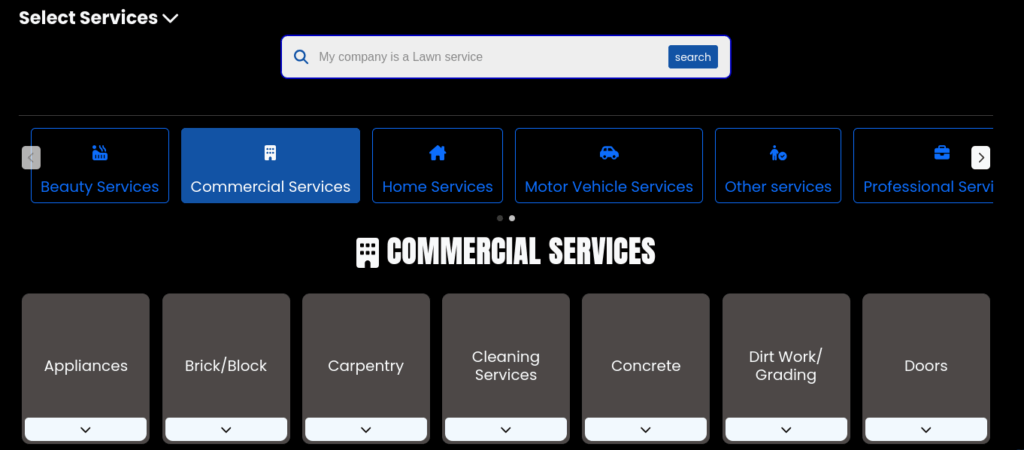
Here, you can use either the search bar or the category drop-downs to find the services you want to be listed under! Your changes will be denoted into what services you’re adding and removing, like so:

The first list is the services you are currently listed under! Then there’s Adding, which is the list of new services your business will be listed under. And finally, there’s Removing, which is the list of services your business will be removed from!
NOTE: There is also the Reset button! This will reset your current selection back to just being your originally selected items
STEP 4: Check Out
Once you make a selection (Or, press ⤴️ Update Selection on Services Pricing), you will be brought to the Checkout page! This page gives you useful information about your order. Let’s give it a once over:
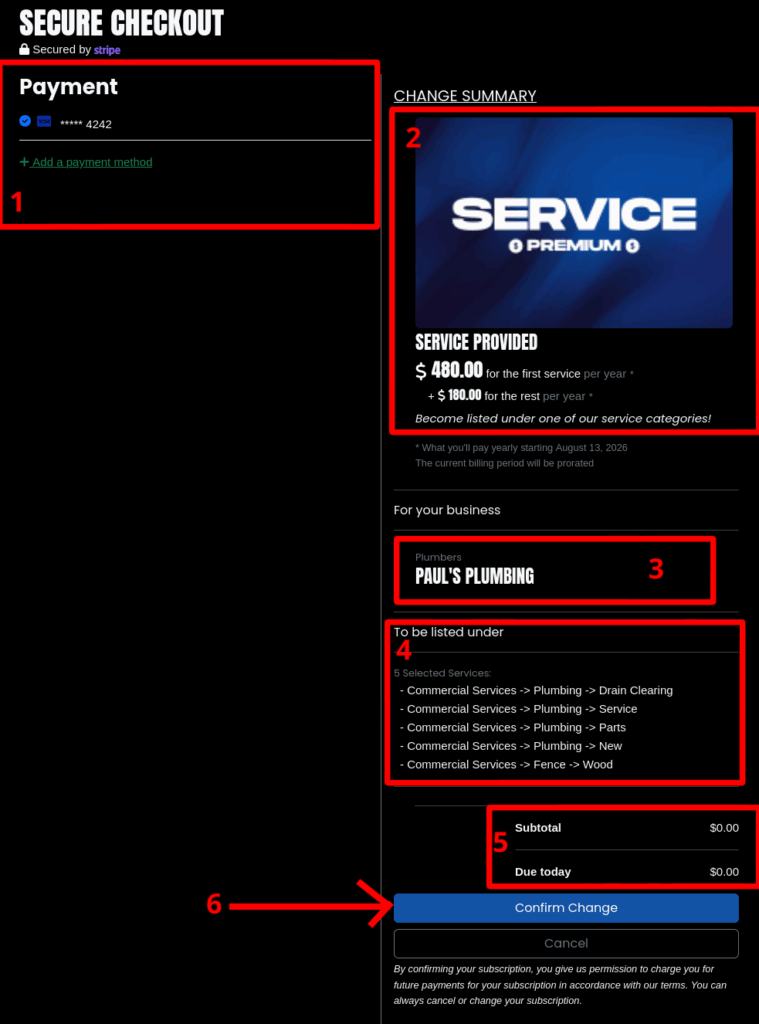
- The Payment Method selector! If you don’t have any linked with your account yet, just press + Add a payment method!
- This displays the information about the plan that you will be transitioning to! In this case, it is displaying the pricing for Services Provided, since that is my plan!
- This is the information about your business! Nothing fancy here, just enough information for you to know who you’re buying for
- This section is extra information that is relevant to your plan. It won’t always be there, however in this case it is – in this case, it is showing me the Services I will be listed under after this change!
- This is the Cost Breakdown section! It will display all information relevant to your pricing – things like prorations, discounts, cost breakdowns, applied balances, etc! In this case, because I am removing and adding a service which results in a replacement, I don’t actually get charged! If you want to see a more complicated example, scroll to the bottom of this page to view it 🙂
- This is the Checkout button! The actual text will vary depending on what you’re doing, but regardless of that by pressing that button you are committing that the information is correct and you want to pay that price!
NOTE: As of writing, there is a small bug that may cause your total to be a few cents off from what it actually is when updating a plan. This solely depends on how long you linger on the checkout page before you actually check out – the proration calculation is ran when you create your checkout session, and then once again when you actually check out. We are working on fixing this to ensure the price remains accurate for you!
STEP 5: Leverage your plan!
So… great! You’re subscribed! Now what? Well, now, it’s time to start leveraging your plan! Your Business Menu will indicate to you the different features that you have and where your information might be lacking. Take a look:

To be optimally leveraging your plan, get as many of these out of the red as possible! Each of them is a feature we have developed to add value both for you as a business owner and for our end users. More are being added all the time, and the ones we have are continuing to improve daily! We hope you enjoy your time with SceneIT, and please, check out these resources if you’re looking to do more:
- Read our FAQ to get common questions answered
- Check out our Knowledge Base to find helpful text and video tutorials on how to use our site, including many premium options
- Manage all your businesses from your Business Dashboard
- If you are at all confused or need assistance, don’t hesitate to Contact Us!
A more complicated pricing example:

Here, you can see there is a proration applied, and credits applied!
Thank you for trusting SceneIT with your business! Don’t hesitate to contact us if you have any questions or need any help!
 SceneIT BLOG