HOW TO: Manage your Business’s Specials
By: Paul Brinkmann
- Compatible plans: Premium Profile
- Compatible categories: Food, Bars
Step 1: Navigate to your Business Dashboard
Prefer a link? Right here: sceneit.us/dm/my-business
Otherwise, press the Log In button:

On mobile:

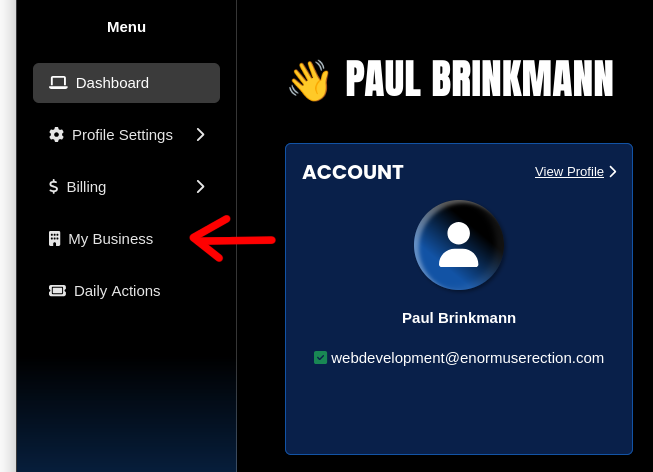
Then, once you’ve logged in, you’ll see a page that looks like this:
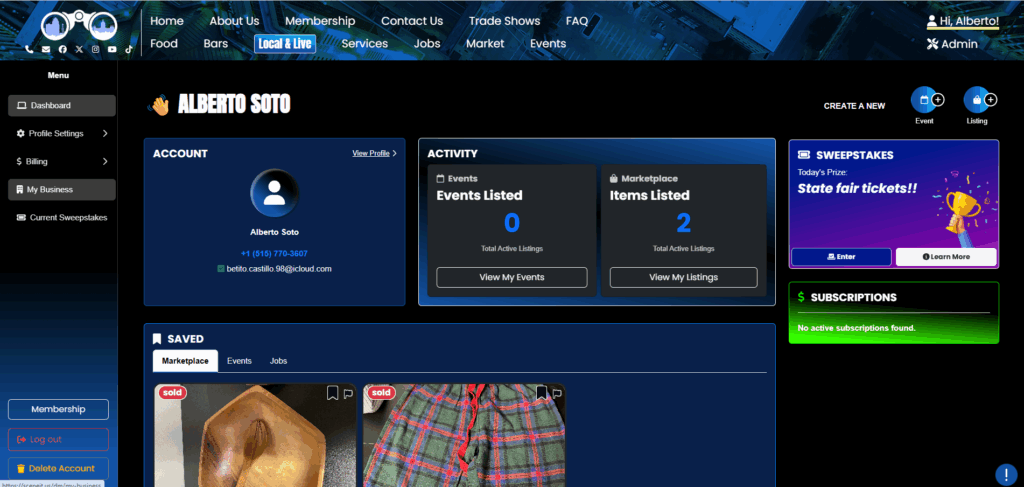
Hover over the menu in the left and press My Business! On mobile, it will just be there 🙂
Step 2: Navigate to the “Specials” section of your Business’s Dashboard
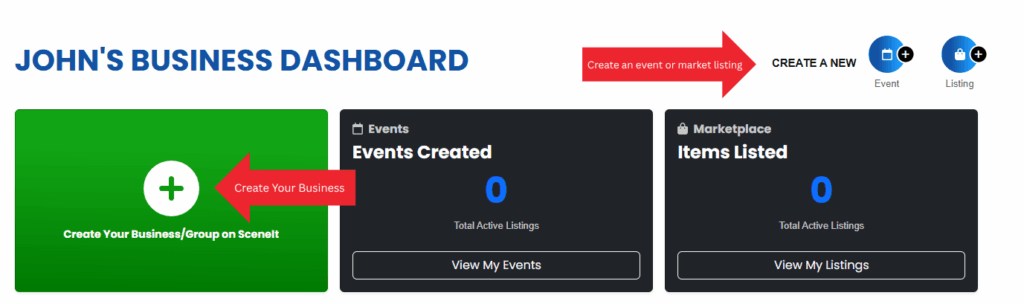
Here, you’ll see your Business Dashboard! This is what it will look like:
Or
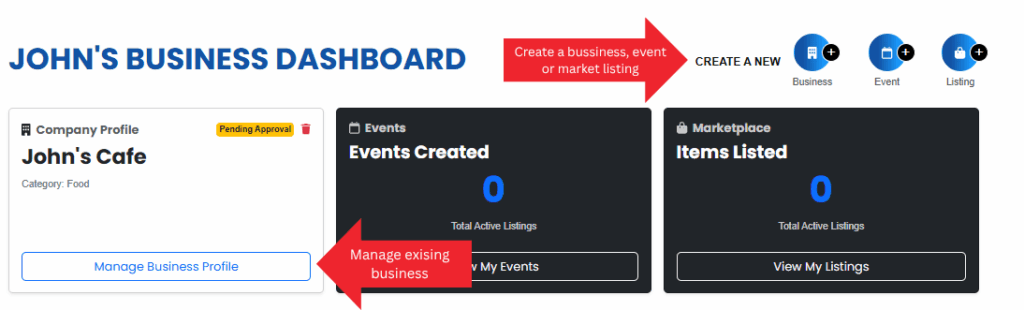
Depending on whether or not your business is already in our system and associated with your account. For more information on this view, check out HOW TO: Create and Manage Your Business
Once you have a business in our system, press the Manage Business Profile button on the business you wish to manage the specials on!
Once you reach the Business Menu, you will see this tab:

NOTE: You must be on the Premium Profile plan to have this feature. To learn how to upgrade, check out HOW TO: Manage Your Business’s Plan
Click either 🖊️ Manage or Start!
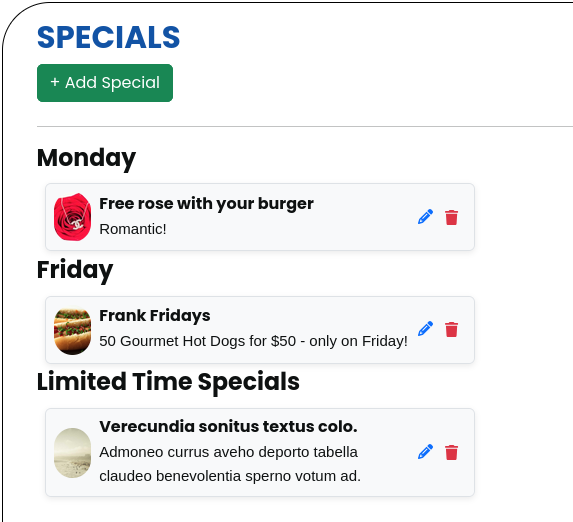
Step 3: Specials page overview
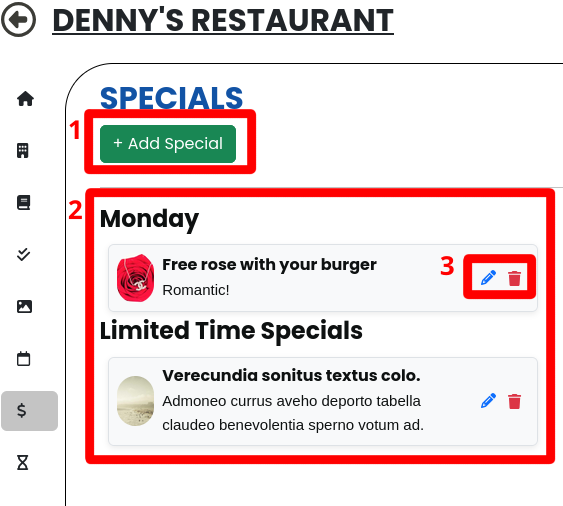
- The + Add Special button, for creating a new special!
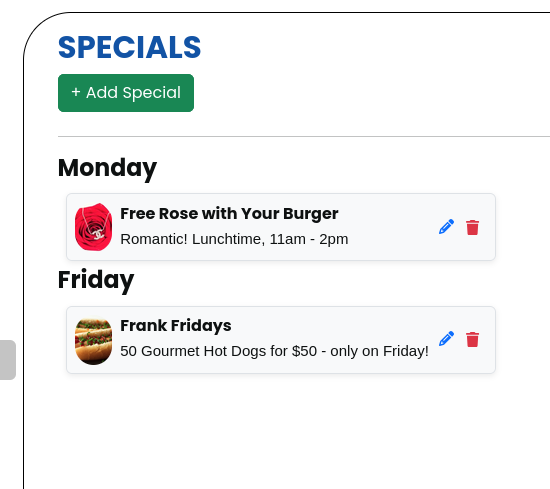
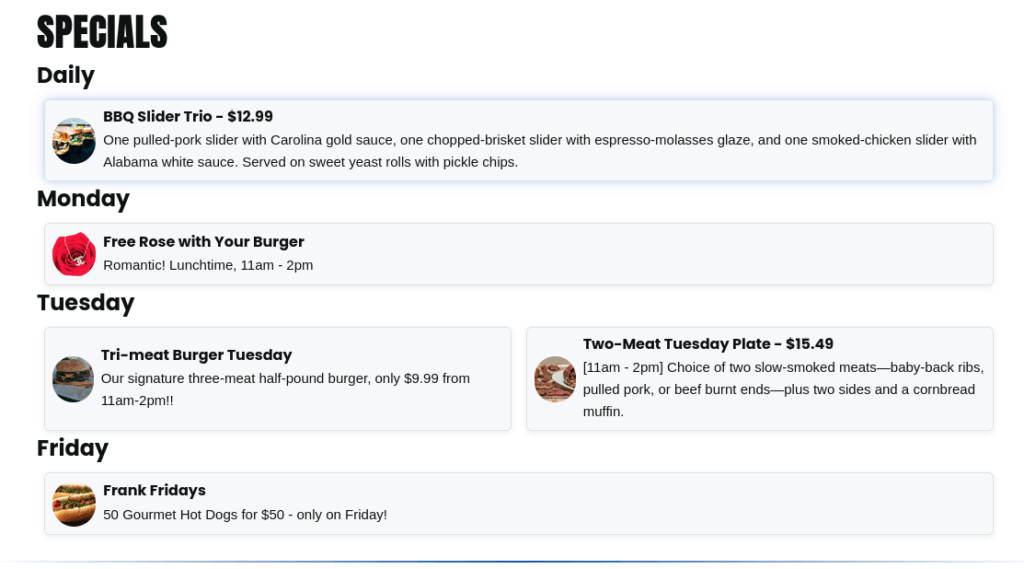
- This is the specials display section! Here you can see (although my example is very simple) that specials are split between the day of the week they are listed on, with an extra section for Limited Time Specials!
- The 🖊️ means edit, the 🗑️ means delete!
Step 4: Create a special
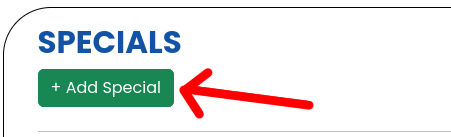
First, press the + Add Special button!
That will bring you to this form! Fill it out accordingly, and make sure to include all relevant details in the description!!
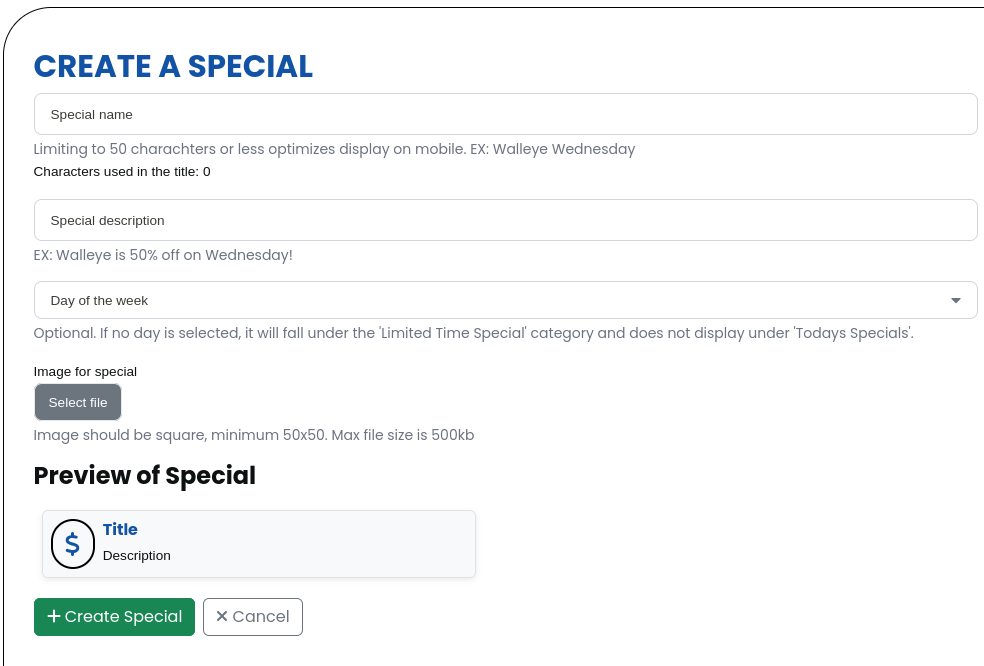
In this form, there’s also a preview of your special!!
Once you’ve filled it out, it might look something like this:
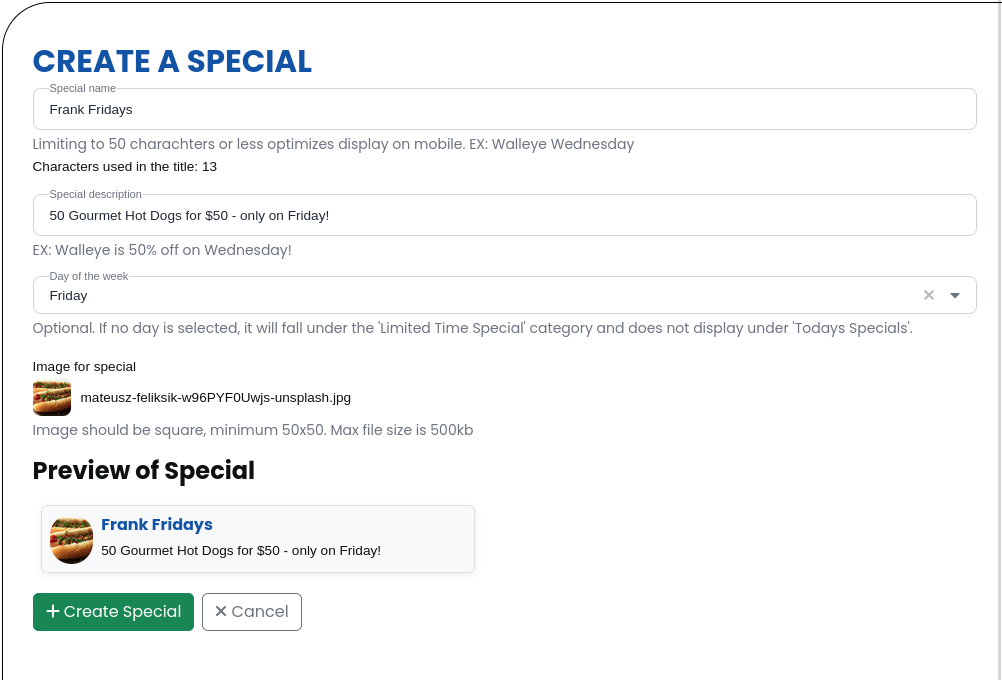
And it looks great in the preview too – awesome!! Now, just press + Create Special!
And there it is!
Step 5: Edit a special
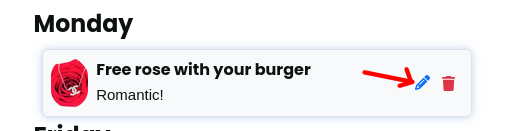
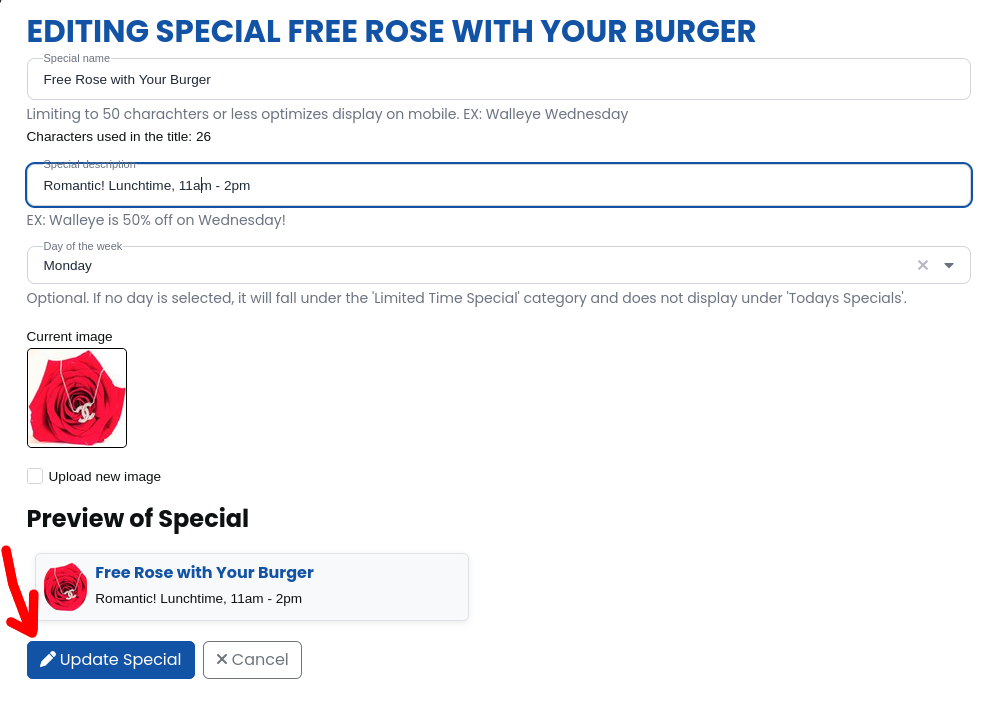
Ope, gotta make a change to “Free Rose with Your Burger”! First, proper capitalization – and then, it’s only supposed to be during lunch. I’ll need to add that!
First, lets press the 🖊️ icon!
Boom! That’ll take us to this form:
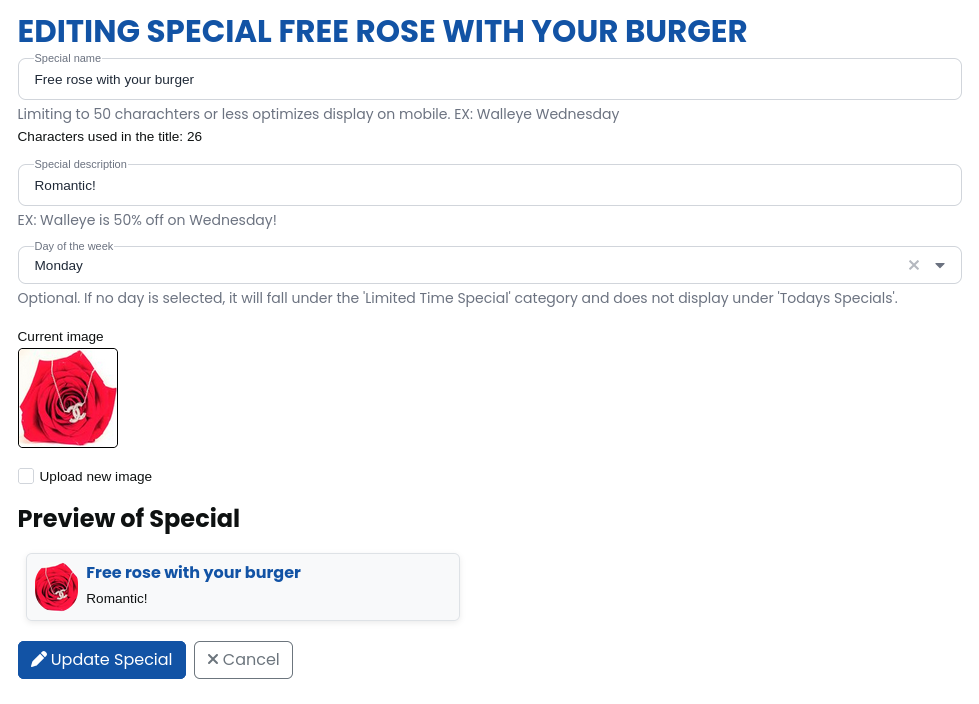
As you can see, this form is populated with the special’s information. Once we’re done updating it, press the 🖊️ Update Special button at the bottom!
Step 6: Delete a special
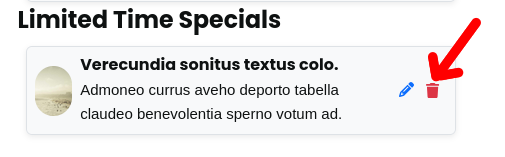
Oh beans, lets get rid of that gross AI generated one that’s in latin… shouldn’t have that in there! Don’t wanna scare away the customers!
First, press the red 🗑️ icon:
That will bring up this dialogue:
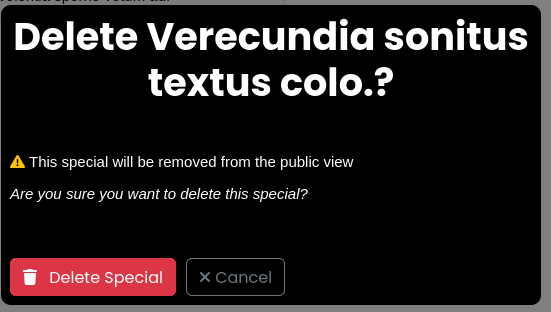
Then, simply press the 🗑️ Delete Special button!
And boom, it’s gone!!
If you want to restore your special, select the deleted tab!

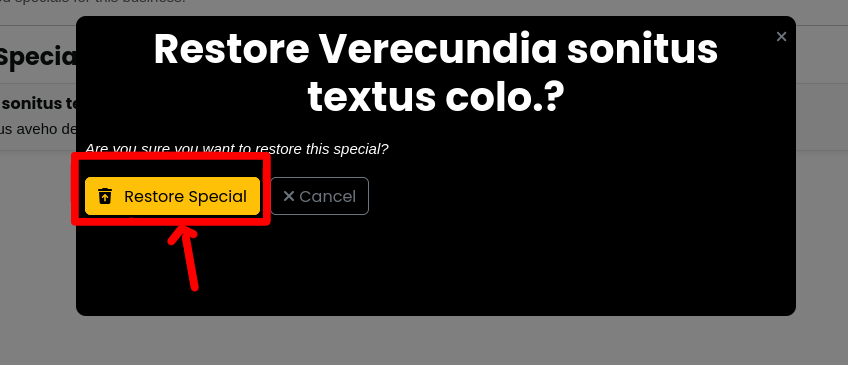
Here you’ll see the restore button:

This will bring up this dialogue. Simply press the Restore Special button and it will be restored!
Step 7: Admire your work!
I’ve taken the time to add a few more! Here’s what my restaurant looks like now:
Awesome!
Thank you for trusting SceneIT with your business! Don’t hesitate to contact us if you have any questions or need any help!