HOW TO: Manage Your Business’s Storefront
By: Paul Brinkmann
- Compatible plans: Advanced Vendor
- Compatible categories: Vendors
So, you’re a vendor on SceneIT. AWESOME! We love that 🙂
But… how do you manage your storefront? Well, let me show you how!
Step 1: Navigate to your Business Dashboard
Prefer a link? Right here: sceneit.us/dm/my-business
Otherwise, press the Log In button:

On mobile:

Then, once you’ve logged in, you’ll see a page that looks like this:
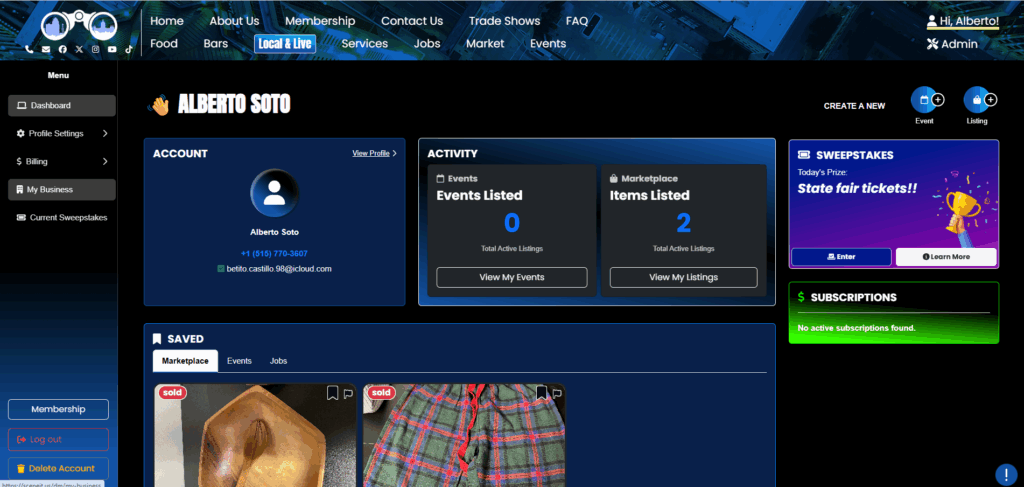
Hover over the menu in the left and press My Business! On mobile, it will just be there 🙂

Step 2: Navigate to the “Storefront Items” section of your Business
Here, you’ll see your Business Dashboard! This is what it will look like:

Or

Depending on whether or not your business is already in our system and associated with your account. For more information on this view, check out HOW TO: Create and Manage Your Business
Once you have a business in our system, press the Manage Business Profile button on the business you wish to manage the storefront on!
NOTE: This business must be under the Category Vendors to have a storefront
Once you reach the Business Menu, you will see this tab:
NOTE: You must be on the Advanced Vendor plan to have a storefront. To learn how to upgrade, check out HOW TO: Manage Your Business’s Plan
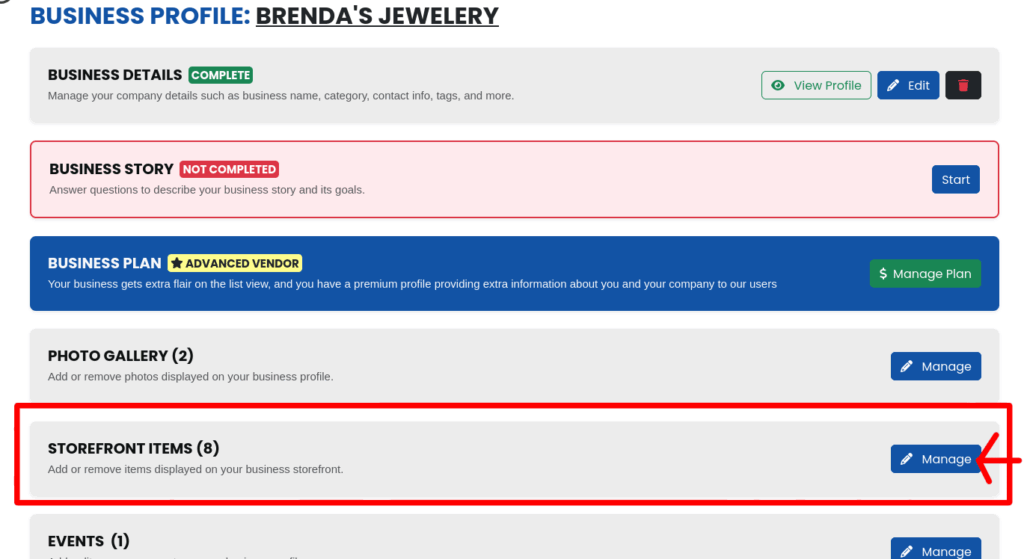
Step 3: Storefront Items Page Overview
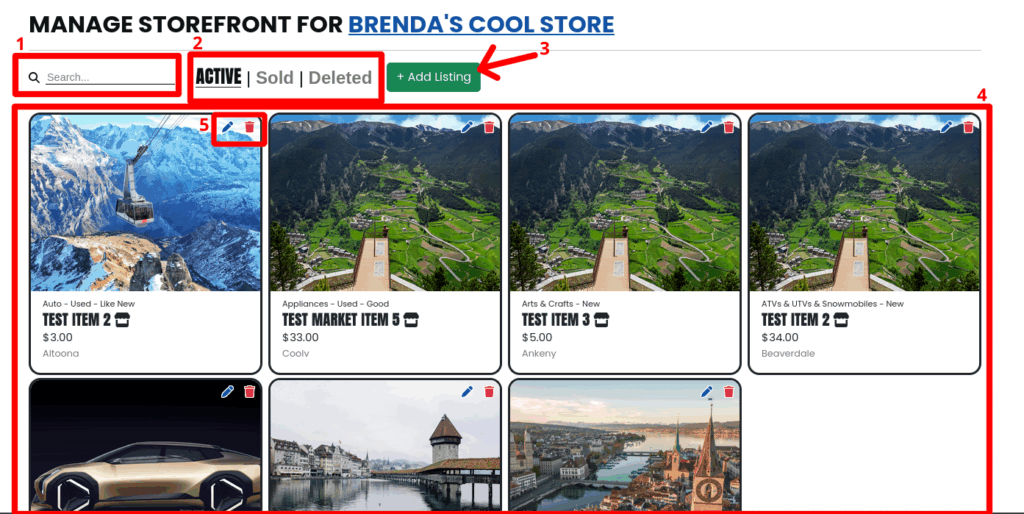
- Search Bar – Searches your items by name!
- Tab Lists – Show different categories of your items (currently active, sold, or deleted)
- Add Listing Button – Create a new listing for your business!
- Your Listings – A list of all the listings listed by your business, that match the provided filters
- Listing Controls – Buttons that allow you to 🖊️ edit and / or 🗑️ delete your listing!
Step 4: Create an item
First, press the + Add Listing button on your Storefront Items page!

You’ll see a form that looks like this!
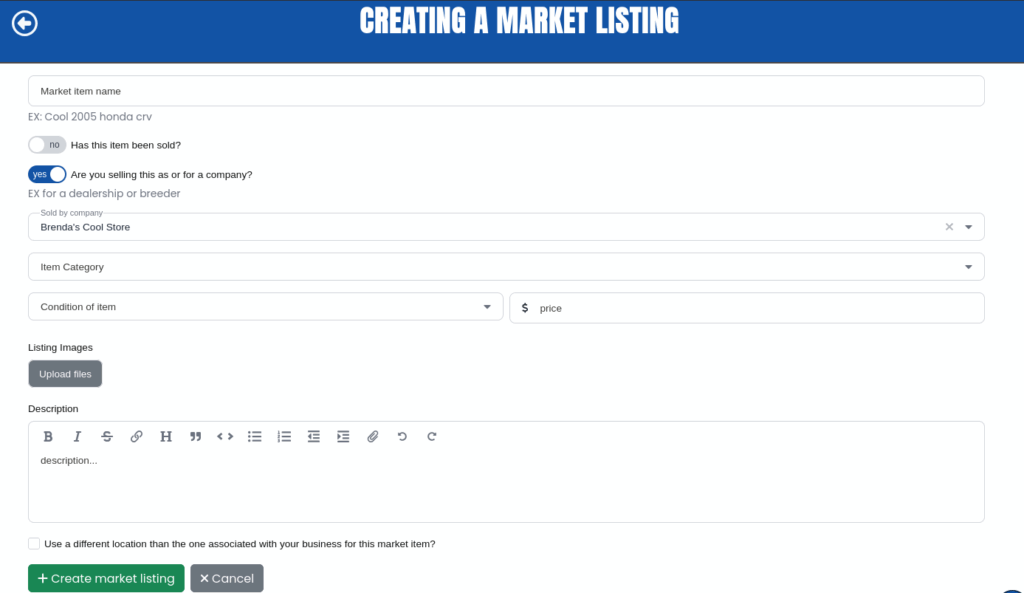
Few notes:
- The “Has this item been sold” toggle applies to the entire listing. If you have more than one, you should only flip this toggle if you are sold out – items marked as sold will be hidden from the general public
- The “Are you selling this as or for a company?” toggle and “Sold by company” select box probably won’t ever need to be changed. Note that if you do change either of these, this item will no longer appear in the storefront you were managing
- Once you select an Item Category, more options will appear so you can provide more information about what you’re selling to your customers!
Once you populate the form, it might look something like this:

Once you’re happy with it, press the + Create market listing button in the bottom left! changed your mind? No worries! You can change any of this information at any time – check out Step 5: Edit an item!
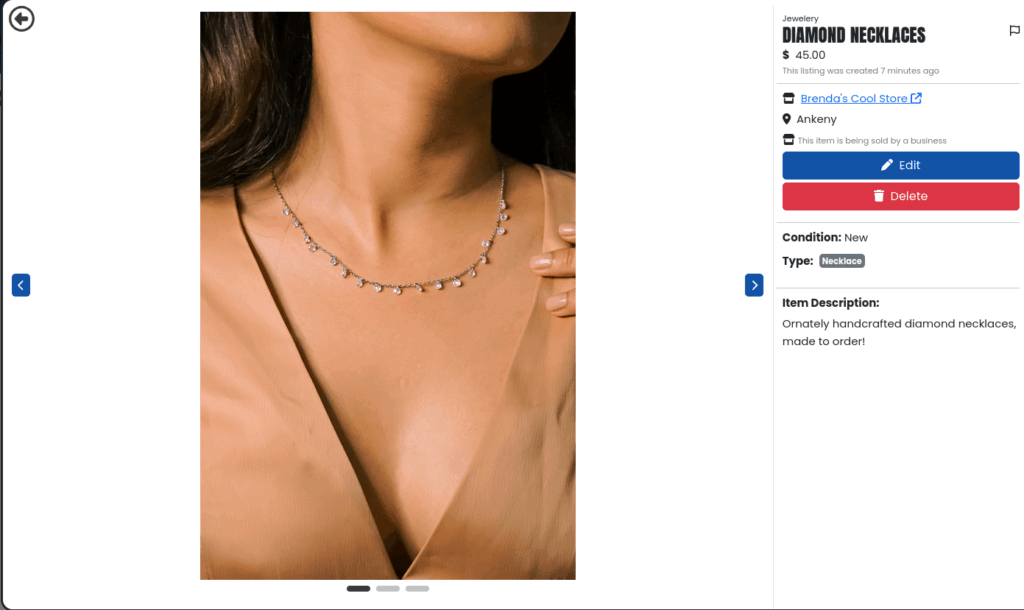
Once you’ve created it, you will be brought to the item view! Here’s what a successfully created item looks like:
Step 5: Edit an item
Uh oh! Something’s wrong – you gotta make a change! No worries! There are two ways to access the edit form. First, from the main storefront view:

Each listing has a little blue pen (🖊️) in the top right, which allows you to edit it!
Or, if you’ve already got the item open, you can click the big 🖊️ edit button on the right-hand side!

This will take you to an edit form, which will bring all the current data for your item into it. From here you can edit anything! Add more tags, edit the description or name, price or condition, or more!! Few notes:
- You can change the order of the images!! When you hover over an image, some buttons will appear. You can click and drag on the one on the left to move an image in the ordering!

The x button on the right side will remove the image if that’s what you want to do!
Boom, look at that – re-ordered!!

And now, if I save my changes (by pressing the 🖊️ Update Market Listing button in the bottom left) – boom! Look at that!
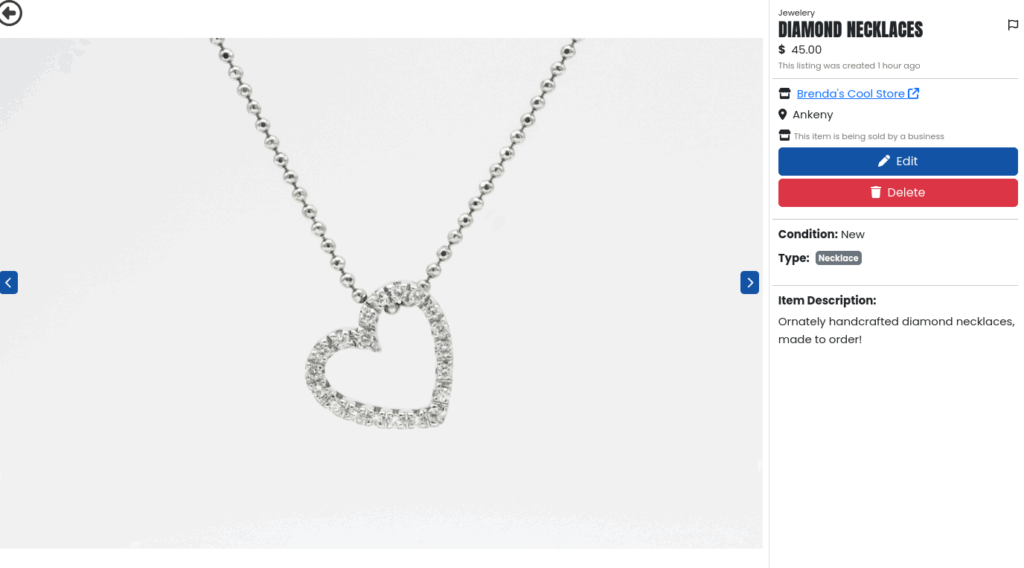
Now my first image is different! And, if I look at my listing in the list view:

The main preview image is different too!
Step 5.5: Sell an item
To “Sell” an item, once you’ve ran out of the stock you have and don’t want it listed on your store anymore, all you have to do is go into the edit form and flip the “Has this item been sold” toggle!

Then, press 🖊️ Update market listing to save this change! And boom – looks a bit different!

It’ll now only appear in your Sold tab, and inquiries will be disabled!
Step 6: Delete an item
So, you’re done with an item. Cool! Similarly to editing, there are two places where you can access the 🗑️ delete button:


Clicking either of these will bring up a pop-up to verify you’re sure you want to do this:

Click🗑️I’m sure, delete away! Your item will now be deleted, no longer visible to the public! You can view it in the Deleted tab on your storefront items page:

On the deleted tab, you can restore your item if you didn’t mean to delete it with this button:

You can still view this item – there is also a restore button on the view page!
It will also have a confirmation pop-up similar to deleting!
The other thing you see there:

Deleted items will be automatically removed in 30 days! That indicator tells you how many days you have until your item is permanently destroyed. After that 30 days, you will no longer be able to recover your item!! Just a warning 🙂
Step 7: Admire your work!
Wow, look at that beautiful storefront!! Here’s the one I’ve been creating:
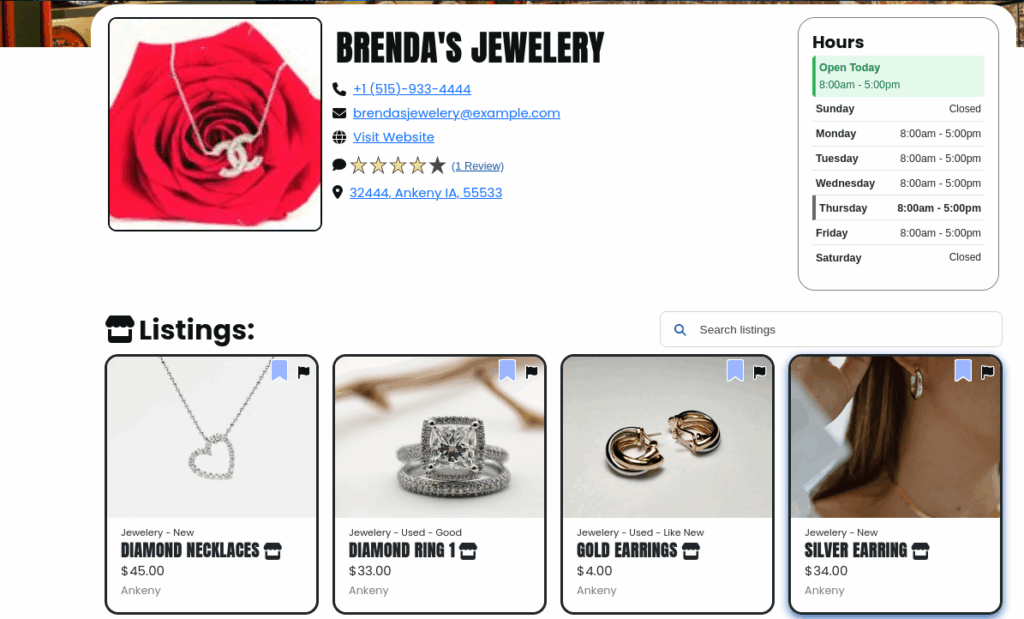
Now, you won’t find mine on our site, because it’s not actually real. However, yours will look and feel the same, but yours will also be on our site!! Exciting 🙂
Thank you for trusting SceneIT with your store! Don’t hesitate to contact us if you have any questions or need any help!
 SceneIT BLOG